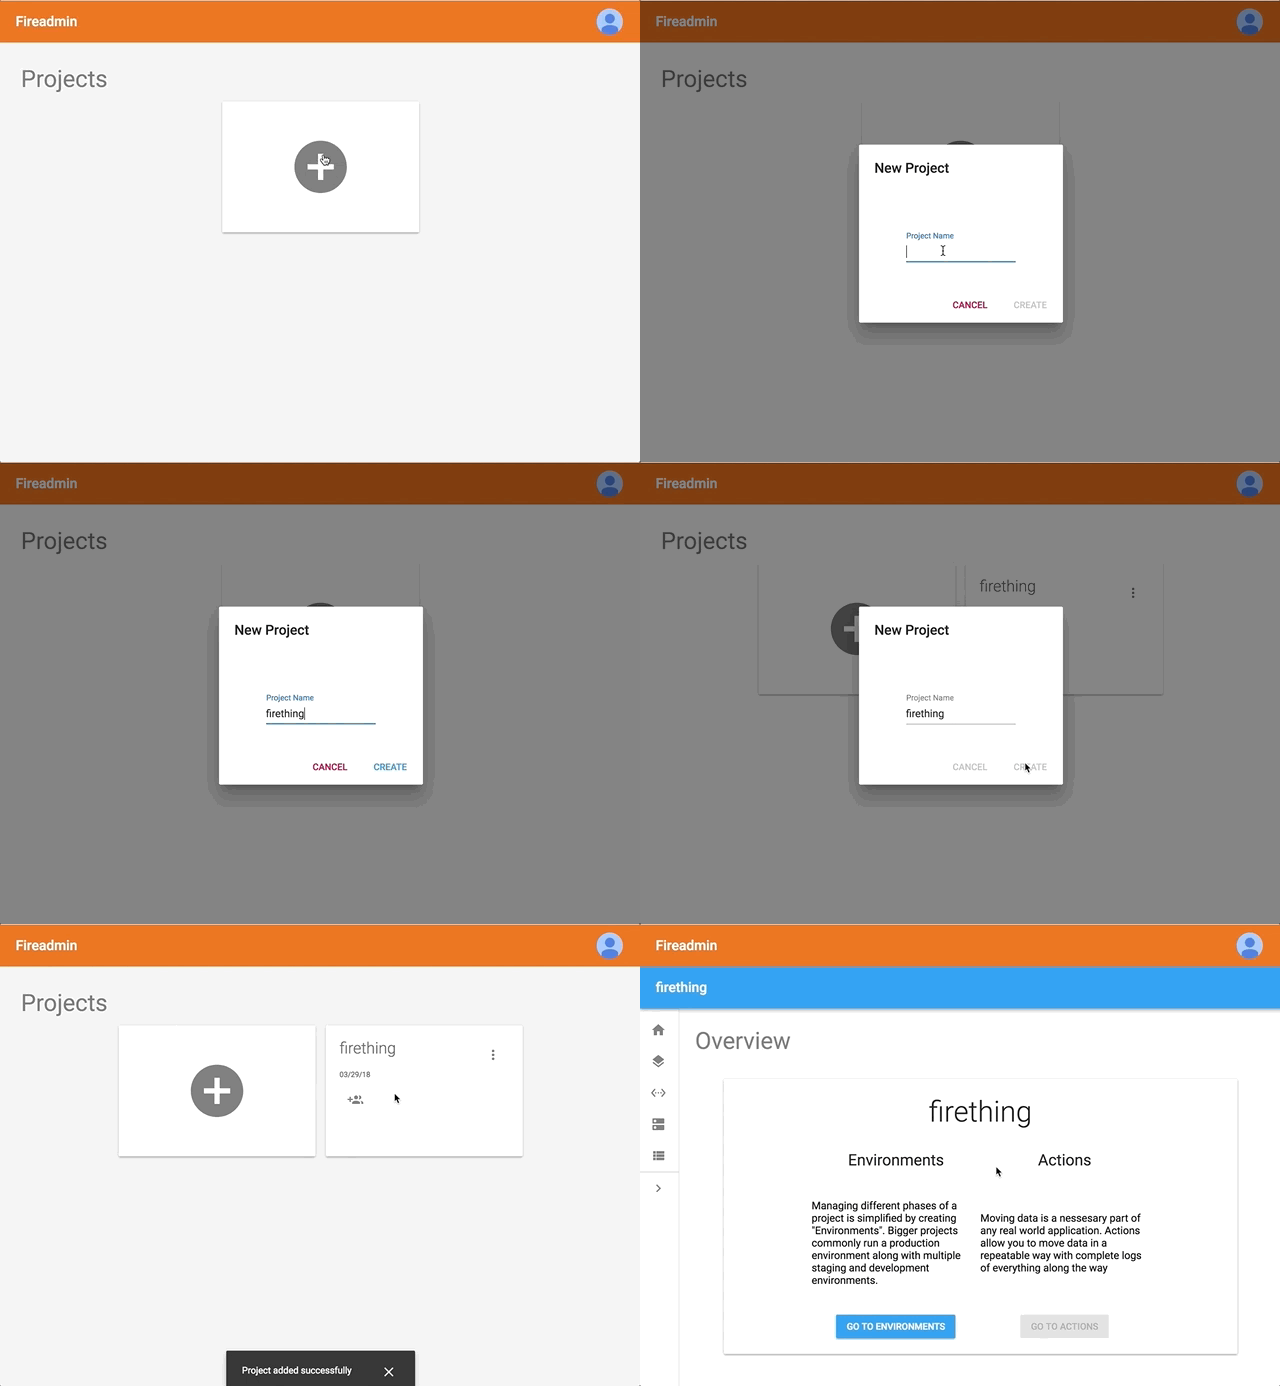
A project created on Fireadmin can contain multiples environments which represent multiple versions of your project. The environment names usually correspond with the state of the application within that environment (i.e. prod for a production environment and stage for a staging environment). In this case each environment is associated with a separate Firebase project.
Before Starting
- Make sure you have multiple projects created on Firebase to represent your multiple environment. We will be running an action to move data between them.
- Get a service a service account for each Firebase project you will be adding to Fireadmin. To get a service account navigate to the Service Accounts tab in the Firebase Console “project settings” page. Then click Generate New Private Key at the bottom of the Service Accounts tab. Your service account will be downloaded as a JSON file — rename the downloaded files in a way that makes it easy to tell a difference (i.e. service-account-prod.json).
Creating a Project
- Create a project by clicking the add tile — we will use the name firething (Note: remember that projects on Fireadmin usually contain multiple Firebase projects)

Adding Environments
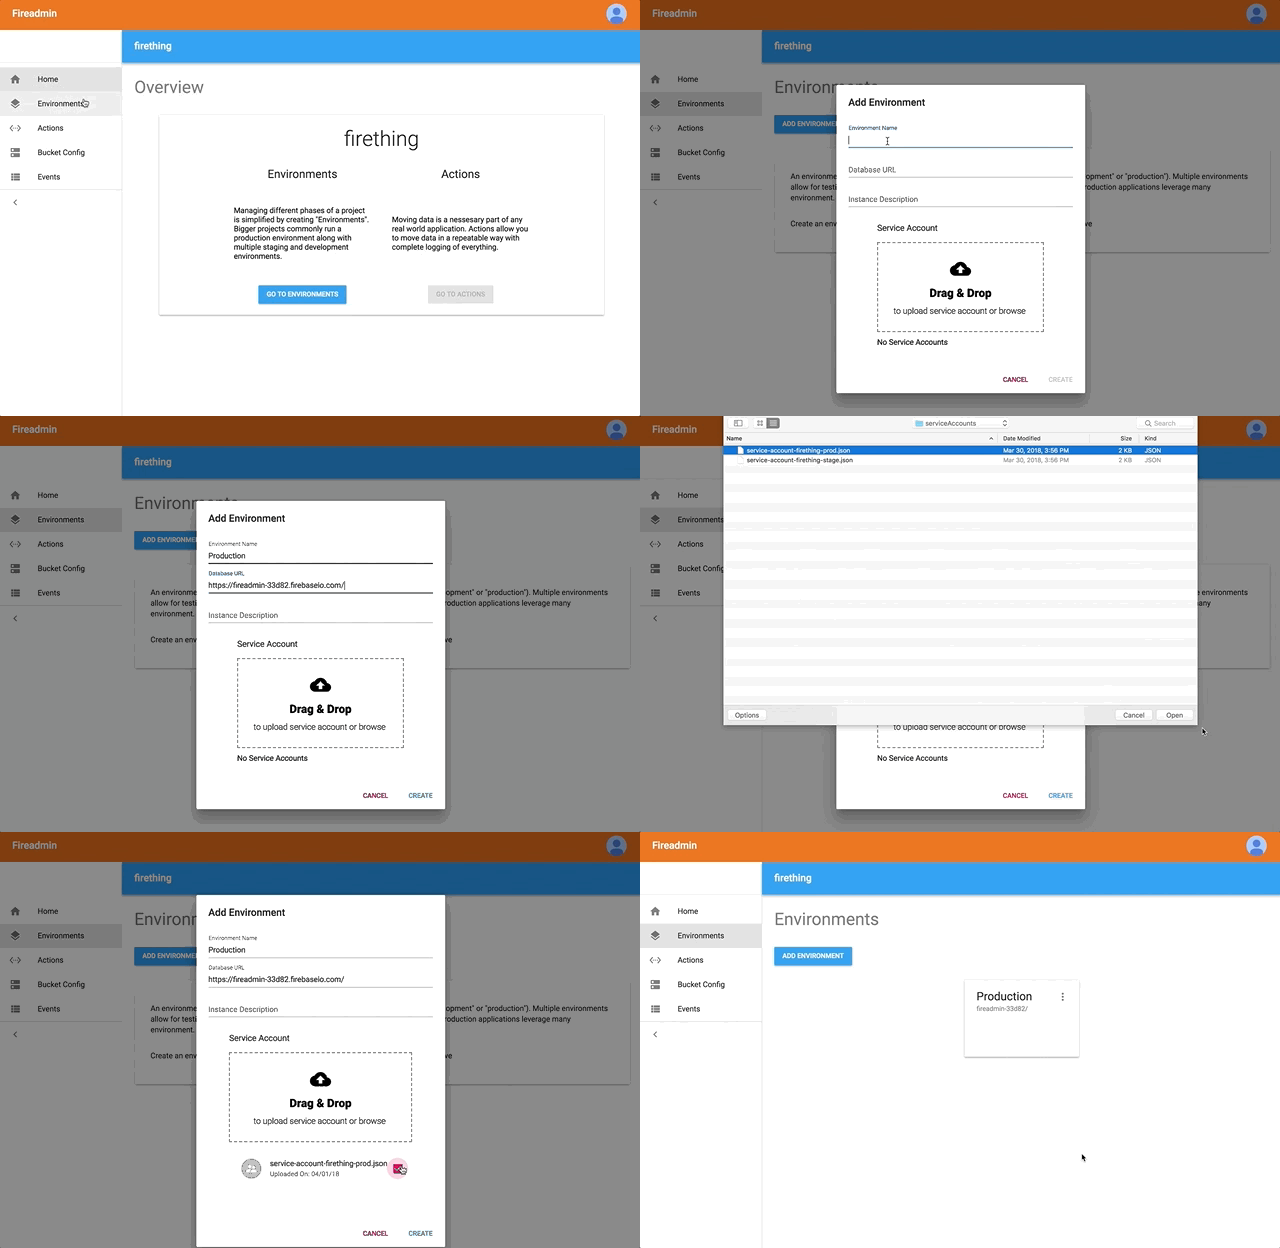
- Go to Environments page by clicking Go To Environments or by clicking Environments in the project sidebar
- Begin adding a new environment by clicking Add Environment
- You can name the first environment whatever you want, but I usually go with Production or Prod
- Fill in the databaseURL of your project (from the Firebase console)
- Feel free to add a description of the environment (not necessary)
- Upload the service account JSON file associated with that environment
- Click Create
- Repeat steps 4–7 again for another environment (I usually name the second one Staging).

Running An Action
Now that we have environments setup, they are ready to be used in Actions (common logic such as copying/moving data). Lets start by searching through the existing action templates.
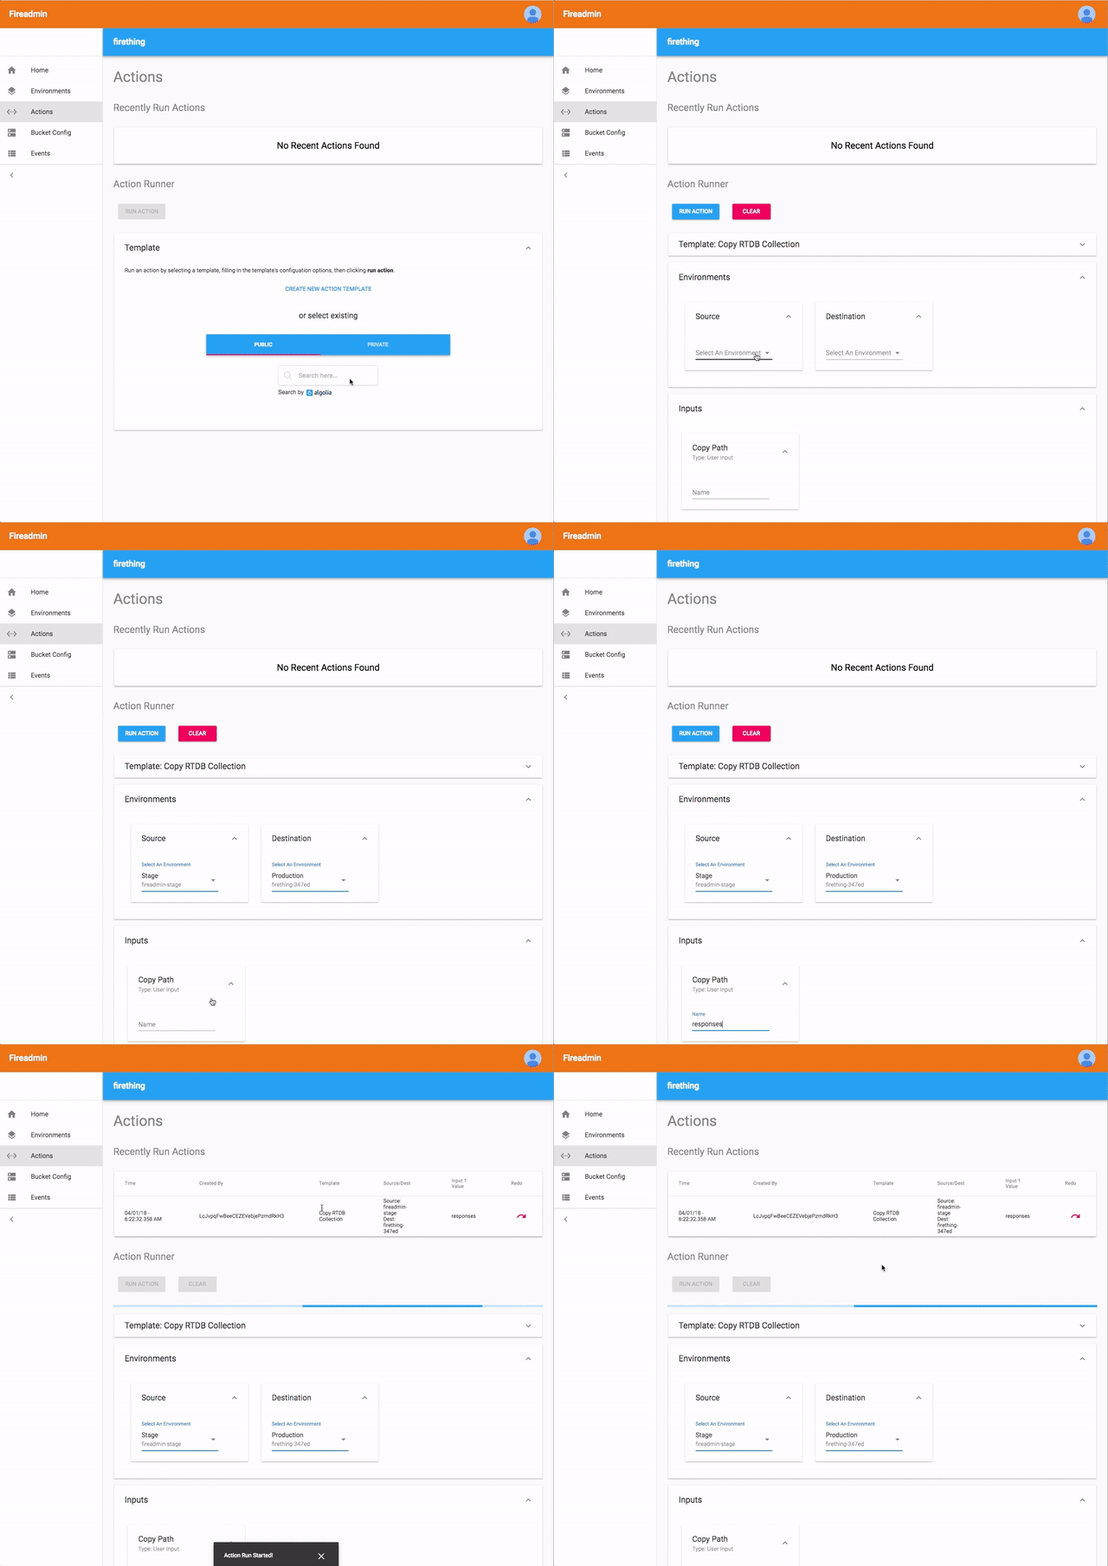
- Go to the Project Actions page by clicking Actions in the Sidebar
- Start searching for the action template named Copy Database Collection
- Click on the name — this loads the the action template (named Copy RTDB Collection) into the Action Runner
- Select the Source Environment (where data is being copied from)
- Select the Destination Environment (where data is being copied to)
- Input a path to copy
- Click Run Action

For information on how to create your own action template, checkout the custom action template guide